User Interface Design in Access
 Once you’ve got a database defined with the tables, queries, and reports you want to track and generate built, you’ll need a method for turning the operation of the database over to end users. Chances are you do not want end users fiddling around with queries in design view, or editing table definitions and potentially breaking all your hard work setting up the application. In order to accomplish this, you’ll need to build Access forms to control what the user sees, and can manipulate.
All forms do one or more of these basic activities:
- Read existing data
- Modify existing data
- Add new data
Regardless of the purpose of the form, you’ll need to create something that makes sense and is intuitive enough to minimize the amount of training you’ll have to do when a user starts using your system.
Layout and Navigation
This is the most fundamental and important aspect of designing a form. It’s also practically impossible to define for you in a simple manner, because the content of a form is driven exclusively by the content of the tables and queries you’re working with. We can however establish a few guidelines for the interface to help you keep it as user friendly as possible.
 Keep it simple – Only add the fields required in the context your user will be working in. A sure fire way to confuse the crap out of you user and end up with bad or incomplete data is by presenting them everything in the database at once.
- Group your controls logically – This is pretty basic, for example, if you have an address to fill in, keep the street, city, state and zip together. If you’re tracking project data across multiple individual jobs, group the information by whose job that piece of data is.
- Highlight and / or bold important fields – Changing the background color or font size and weight can bring focus and emphasis to important data. Use this to guide the eyes to that field so your user will know what they’re looking for.
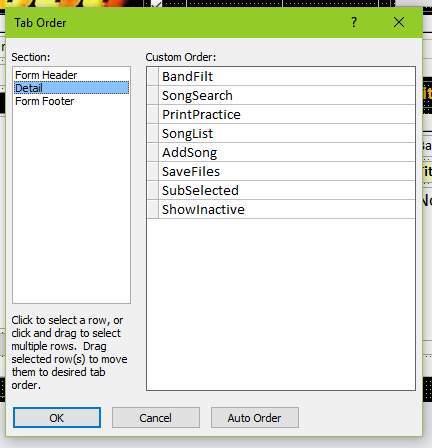
- Use the Tab Order – Every form has a defined tab order. This is the order the controls will flow as the user hits the tab key. It’s faster to never take your hands off the keyboard, so a proficient user will be able to user your tool more efficiently if hitting the tab key moves them in a logical and predictable manner.
Adding Controls
 Now that you have a form, you’ll need controls to do something. The simplest method is dropping existing fields onto the form with the Add Existing Fields tool. This will create controls bound to those fields from the forms record source. You may also add more controls that are not dependent on fields of data, these are called unbound controls and can be used to take actions like searching, and enabling things through Visual Basic or whatever you deem fit.
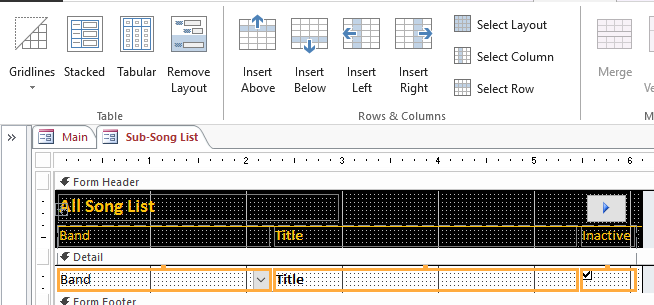
Laying them out is much simpler in Access 2007 and later using the Arrange ribbon and selecting tabular or stacked. These options will take the selected controls and lock then in a layout that you can manipulate easily.
List and Combo Boxes
These can be used to limit your users to pre-defined groups and categories. This is really important if you’ve normalized your database a bit and have to relate a record to another table. Start by dropping the field onto your form, creating a basic text box. Then right click and select Change To. Here you can change that text box between combo box and list box varieties.
Once you have a look up box, it’s a matter of setting the row source and formatting the display to make it work. Here are some of the important basic properties to set:
- Row Source – This determines the list displayed can be a simple list of values, a saved query or table, or its own SQL statement.
- Bound Column – This sets the column that actually contains the data the control will be set to
- Limit to List – This will force the value to be chosen from the list. If a user tries to enter something new, they will be greeted with a message or given the opportunity to add a value, provided you’ve set the List Items Edit Form property or trapped this in Visual Basic code with the On Not in List event.
- Column Count – Determines how many columns to display, they start at the left so if you pick a wider table or query, the fields to the right will be ignored
- Column Widths – Sets the width dedicated to each column. Access will make up widths by default, and if you set a column to 0 width, it will be hidden completely.
Make it Pretty
One of the best improvements from Access 2003 to 2007 and beyond has been the Anchoring ability. Anchoring allows your controls to move about the screen as the resolution or window size is changed. Prior to this, the controls were stuck where they were placed, leaving a whole lot of unusable space if you resized the window or went to a computer with a larger screen. There are 9 anchoring settings available for your controls:
 Top Left – The default, which means the control will be pinned where you put it based on the top left location
- Stretch Across Top – This means the control will start at the top left spot you placed it, but will automatically expand to the right as the window gets wider
- Top Right – This means the control will stay pinned to the right side as the window gets wider, like right aligned text
- Stretch Down – This means the control will stay the same width and on the left side, but will stretch down as the window height is increased
- Stretch Down and Across – This is a combination of both Stretch Across Top and Stretch Down settings. The control will take up all available space as the window size is changed
- Stretch Down and Right – This is the same setting as plain stretch down , except it will stay pinned to the right side instead of the left
- Bottom Left – This will keep your control pinned relative to the bottom of the screen and on the left side
- Stretch Across Bottom – This setting keeps your control at the bottom, but stretches it across as the window gets wider
- Bottom Right – This is simply a right justified version of the Bottom Left setting
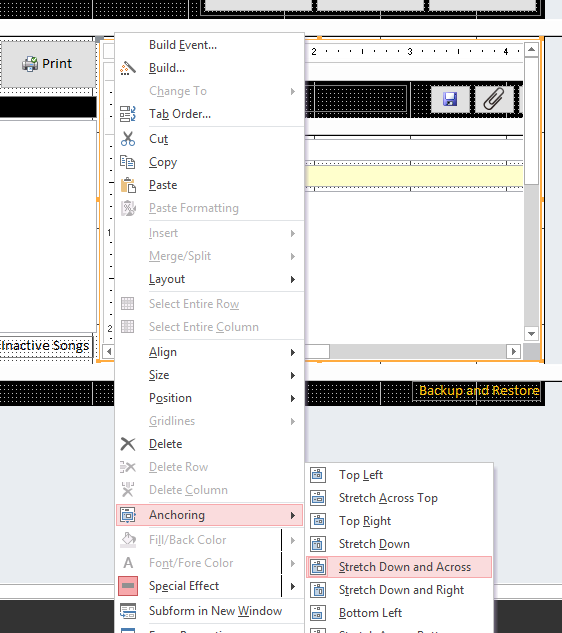
The best method to get used to these settings is by simply watching in Form View. Change the window size and see how the controls move around. Some of these will conflict, particularly the stretch across top or down settings. You can’t have more than one control in your group with these settings or they’ll start to re-size on top of each other.
 Anchoring also works well for graphics on your forms. The stretching is particularly useful for gradients to make a nice fade effect across the screen. This is typical in web design by repeating a thin gradient image across the x or y axis. To do this in Access, make a small gradient image, add it to your form, then apply anchoring to stretch it down and across to make it fit the window all the time. Make sure your image properties are set to stretch, or this won’t work.
Access 2007 and later also includes a Layout View, where you can move around your controls while they’re active on the screen. This has been of limited use to me, but is available nonetheless.
Data Control
You can control what your users can do to your data with a combination of a few properties. First, a form that can directly manipulate your data must be bound to that data. This is set as the Record Source property of the form and can be in the form of a table, saved query, or the form’s own query SQL statement. Next, the form properties can determine what is allowed:
- Data Entry – Set to true to force the form to always open to a new record
- Allow Additions – Set to false to disallow addition of new records
- Allow Deletions – Set to false to disallow deletion of records
- Allow Edits – Set to false to disallow any changes to the displayed data. Note: this also has the side effect of locking unbound controls, so watch out for that!
Note that if you set the record source for a form to a query with a bunch of joins, grouping or other complications, it’s likely to no longer be editable and Additions, Deletions, and Edits properties will be moot.
Automating Actions
This is where the object oriented programming comes in. If you’re willing to dig into the Visual Basic Editor, you can do some really cool things based on actions your users take on the form and the values displayed. Even if you don’t want to dig into the Visual Basic editor, Access will generate some embedded macros that do the job as well. Personally I prefer full control in the form of VB, so I don’t use the embedded macro functions, so you’re on your own there. The simplest form of an action control is the good old command button. Adding one of these will prompt you for the action you want. Go through the wizard, or look at the properties and do it yourself. The button will have an On Click listed in the events, change this to [Event Procedure] and you’ll have a Visual Basic subroutine to edit.
Private Sub SaveSong_Click()
DoCmd.RunCommand acCmdSaveRecord
End Sub
In this simple example, a Save button has been placed on the form that simply calls the save record command. The possibilities are huge here, so refer to Pseudo Object Oriented Programming article for details on how to get started.
Grouping Controls – Tabs vs. Sub-Forms
 There are a couple handy methods for grouping stuff and allowing navigation actions. The first is the Tab Control.
This little bugger was my favorite in Access 2003 for its simplicity. Individual tabs can be shown or hidden, and controls can be placed on any individual tab. You can then re-order them, re-name them and take actions when the tabs are changed. There’s only one major oversight… these do not allow anchoring. That’s a deal breaker for me so I had to come up with another solution.
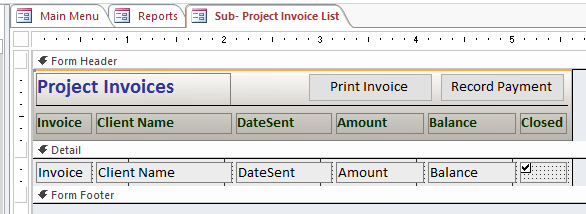
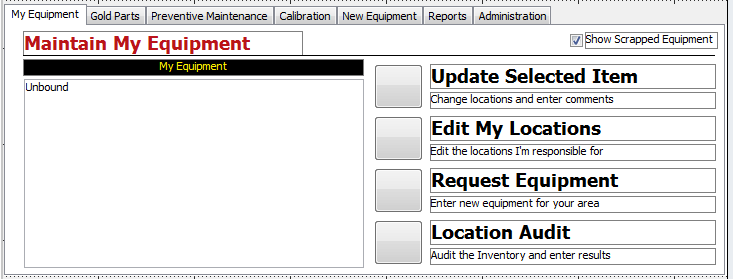
 Subforms can be used to display a form within a form. These do support anchoring and can therefore be sized to take advantage of the whole screen. They can also be related to the parent form data and automatically change based on the selected parent record. The real magic is in changing the subform source based on user input on the parent form. In Access 2010, Microsoft introduced a Navigation Form for this purpose. As far as I can tell, it’s simply a pre-canned version of what I’m telling you about now. My method involves the use of toggle buttons inside an option group, a subform, and some Visual Basic code.
Here we have an option group called SubSelect and a subform called SubDisplay. Now you can add however many buttons you want and change the subform displayed based on the button hit using this code:
Private Sub SubSelect_AfterUpdate()
Select Case Me.SubSelect
Case 1
Me.SubDisplay.SourceObject = “Sub-Song Notes”
Case 2
Me. SubDisplay.SourceObject = “Sub-Set Lists”
Case 3
Me. SubDisplay.SourceObject = “Sub-Song List”
End Select
End Sub
If you want to disallow a particular button for a user, simply disable or hide the button and the user cannot navigate to activate that subform. One important consideration: if you have a parent child relationship setup in the Link Master and Link Child Fields properties, make sure all selectable subforms have those same field names on them.
Locking up the Interface
Now you’ve spent all this time presenting your users with pretty forms to work with, you’ve made sure all these criteria are met and want to present your database as if it were a full blown standalone application:
- All tasks users require are available with buttons and other navigation controls
- All potential queries and reports are included and can be run with buttons or controls
Now some know it all opens your system and uses the navigation pane to screw up your master queries or overwriting and deleting records, resulting in everyone freaking out. What can you do?… You can make it difficult for them to get to those parts of the database.
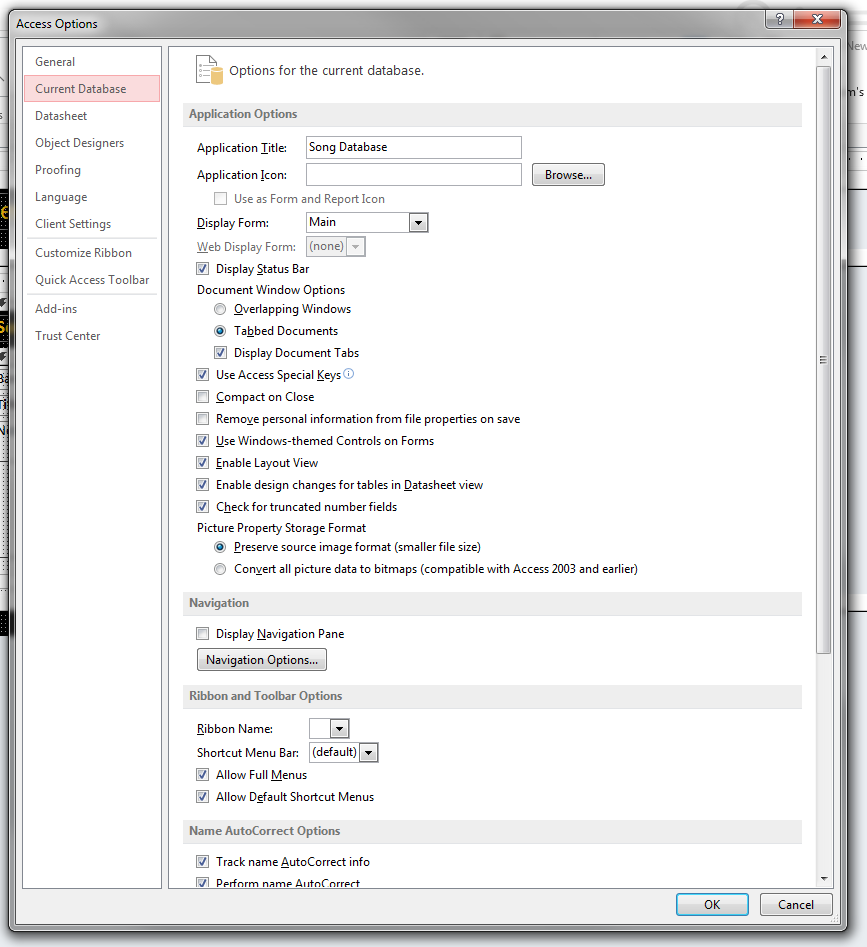 Within the Access options, there’s a Current Database tab that grants you control over how your database is presented to end users. Here are some of the important ones:
- Application Title – This is what is displayed on the title bar for the window and in the task bar. Change it to make sense
- Display Form – Set this to open a particular form when the application is started, typically your main navigation screen
- Use Access Special Keys – This can stop the user from hitting F11 and seeing the Navigation Pane, or Alt+F11 for the VB editor (it also stops you from using those keys)
- Display Navigation Pane – This one chooses whether the navigation pane is even visible at startup, you’ll definitely want to disable this one
Generally, changing these settings will stop the majority of users from fiddling with your database, especially if you’ve taken proper care of your forms and made them easy to use. Of course there’s still the possibility they’ll be holding the shift key down while running the application, stopping all your startup options and showing them a blank screen with a navigation pane. To stop that, we’ll have to work a little harder, which is the subject for a follow up article… stay tuned!
Optimizing and Improving
The best way to find out what works and doesn’t is to use your database yourself. You’ll learn pretty quickly what layout and navigation decisions made no sense after you use them a million times. Keep using them, and changing them as you go. But when you do… make sure you’re saving backups and doing some version control. If the database isn’t something you’re using yourself, make sure you get constant feedback from your users. If you don’t take care of their concerns, they’ll work around them in unexpected ways… probably without telling you.